

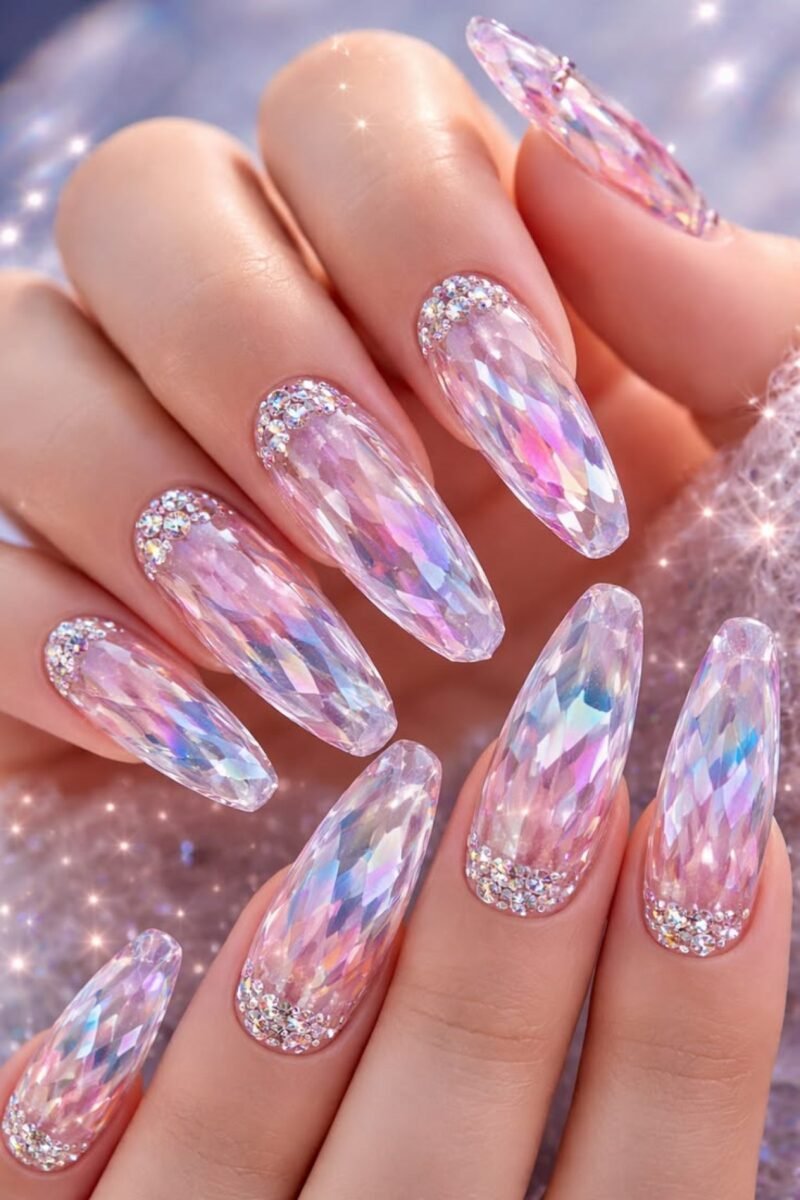
Bedazzled nail art is exactly what it sounds like: crystals, rhinestones, or gems applied directly to the nail surface, either scattered sparingly or clustered into a pattern. It’s the biggest nail trend of the current cycle, driven by a broader return to Y2K maximalism after several years of minimalist, barely-there manicures. Most coverage shows the finished look and stops there. This covers both a full salon version and a home DIY version, what each one actually costs, and what happened when something went wrong with both.
Key Takeaways
- A salon gel set with dense crystal clusters held for 2 to 3 weeks; a DIY scattered version at home lasted 3 to 5 days.
- A dense cluster design on two accent nails added roughly $30-$50 on top of a standard gel manicure, bringing the full set to around $95-$120 with tip.
- The top coat seal matters more than the crystals themselves. Skipping a thorough seal over each crystal’s edge is the main reason embellishments lift early.
- Never force crystals off. Removing them without soaking first can peel the top layer of the natural nail underneath.
- Medium almond nails suit this style better than short square ones, which look bulky under a dense cluster.
What “Bedazzled” Actually Means Here
The term covers a range of looks, from a single rhinestone placed near the cuticle to nails fully clustered with mixed-size crystals. What they share is the same underlying method: gems are applied on top of a finished nail, either a cured gel base or dried regular polish, rather than being painted on as part of the design itself.
The current wave draws heavily on Y2K style, and celebrity visibility, including looks worn by Kylie Jenner and other public figures at recent events, has pushed the trend further into the mainstream. The technique itself isn’t new; what’s changed is the styling, with more delicate, jewelry-inspired placement replacing the denser, all-over look bedazzled nails had in earlier trend cycles.
This is one of ten techniques covered in our broader guide to nail art techniques for 2026, where it’s listed alongside other approaches like glazed jelly and reverse stamping. This article goes deeper specifically into the crystal embellishment method, since it behaves differently enough from painted techniques to need its own breakdown.
The Salon Version: Dense Clusters, Real Cost
The salon set was a fairly dramatic take: full dense crystal clusters on both ring fingers as accent nails, with the rest kept to a minimalist nude base. That contrast, heavy detail on two nails against a plain base everywhere else, is a common way stylists balance the look without covering all ten nails in crystals.
A standard US gel manicure runs roughly $45 to $65. The dense cluster accent nails added a further $15 to $25 per nail on top of that, since placing and sealing that many crystals evenly takes real time. With tip, the full set came to around $95 to $120. That’s meaningfully more than a plain gel manicure, and worth knowing before booking if the dense cluster look is what you have in mind rather than a lighter scattered version.
The set held up well: roughly 2 to 3 weeks before it needed redoing, which is in line with how long a standard gel manicure lasts on its own. The one issue was a single crystal that came loose in the second week, caught on fabric while getting dressed. Rather than book another salon appointment for one crystal, it was fixed at home with a dab of nail glue on a toothpick tip, the crystal pressed back into place, and a drop of top coat sealed over it. The whole fix took about two minutes and held for the rest of the set’s life.
The DIY Version: What It Actually Takes
For a faster, lower-cost version between salon visits, or before a last-minute event, the process at home is straightforward but shorter-lived. The full kit costs under $20 and is reusable across several manicures:

- A basic wax-tipped picker pencil (a dual-ended one from a brand like Makartt runs $5-$10 on Amazon or at Target) to pick up and place each crystal
- A brush-on nail glue rather than a tube, since tube glue tends to be messy and harder to control. Kiss Pink Gel Nail Glue and Beauty Secrets Drip-Proof Glue, sold at Sally Beauty, both work well for this
- A regular gel-finish top coat for sealing
The method: apply a base color first, pick up each crystal with the wax pencil, place it with a small amount of brush-on glue, let the glue set for about two minutes, then apply a thick layer of gel-finish top coat over the whole nail to lock the edges down. That top coat step is the one that determines whether the crystals survive normal wear or start lifting within a day or two.
Done with scattered, minimal placement rather than a dense cluster, this DIY version typically lasts 3 to 5 days before crystals start coming loose, considerably shorter than the salon gel version, but reasonable for a single event or a few days of wear.
DIY vs. Salon: Side by Side
| DIY at home | Salon application | |
|---|---|---|
| Placement style used | Scattered, minimal crystals | Dense cluster on accent nails |
| How long it lasted | 3-5 days | 2-3 weeks |
| Cost | Under $20 for reusable kit | $95-$120 for the full set with accents and tip |
| Best suited to | A single event, last-minute plans | A longer stretch of wear, more dramatic placement |
A Removal Mistake Worth Avoiding
Early on, a set of crystals was removed by force, picking them off rather than soaking them first. That pulled away the top layer of the natural nail underneath along with the crystal, leaving a rough, thinned patch that took weeks to grow out cleanly.
The fix going forward: soak in pure acetone the same way you would for any gel removal, letting the polish layer beneath the crystals loosen along with them, rather than picking at a base coat that’s still fully intact. It’s slower than pulling them off, but it’s the difference between a clean removal and actual nail damage.
A Few Things Worth Knowing Before You Try This
Shape matters more than expected. Medium almond nails suit this style well, since the tapered shape gives crystals a natural spot to settle and makes fingers look longer under the extra detail. Short square nails tend to look bulky and overcrowded under a dense cluster.
These photograph better than they look indoors. Crystal nail art catches noticeably more shine under direct sunlight or phone flash than under normal indoor lighting, which is part of why the look photographs so well on social media specifically.
There’s a brief adjustment period. A heavy dense cluster nail feels slightly weighted on the first day. That sensation fades within a day or two as it becomes normal to move your hands with it.
Ask specifically for flat-back crystals with sealed edges. Flat-back Swarovski or Preciosa crystals, rather than ones with sharp or raised edges, catch on fabric far less. Asking the manicurist to seal the edges thoroughly with UV builder gel makes a real difference to how often crystals snag on clothing.
Who Should Skip This
If your hands are in water frequently, such as kitchen work or frequent dishwashing, or you do heavy keyboard typing, skip the dense cluster designs specifically. These are exactly the conditions that catch and lift embellishments fastest, and a design that looks intentional on day one starts looking patchy fast under that kind of daily wear.
This is a strong choice for a wedding, an event, or a vacation, where the goal is a striking look for a defined stretch of time rather than everyday durability.
Frequently Asked Questions
Do bedazzled nails damage your natural nails?
Not if removed correctly. The crystals sit on top of the polish or gel layer rather than penetrating the nail itself. The real risk is in removal: picking crystals off a still-intact base coat can peel away the top layer of the natural nail, which is exactly what happens if you force them off instead of soaking first.
How long does a dense cluster design actually last?
A salon-applied gel set with dense clusters on accent nails held for roughly 2 to 3 weeks, in line with a standard gel manicure. A scattered DIY version at home typically lasts 3 to 5 days.
What’s the safest way to remove crystal nail art?
Soak in pure acetone the same way you would for gel removal, letting the polish layer beneath the crystals loosen along with them. Picking crystals off by force is what causes nail damage, not the crystals themselves.
Which nail shape works best with this style?
Medium almond shapes tend to suit dense cluster designs well, since the tapered shape gives crystals room to settle and elongates the fingers. Short square nails often look overcrowded under the same density of crystals.
Is salon application worth the extra cost over DIY?
It depends on the look and how long you need it to last. A dense, symmetrical cluster design is genuinely harder to place evenly at home, and a salon set held roughly three to four times longer than the DIY version in direct comparison. For a few days of scattered accents, the DIY route is a reasonable trade-off.
What to Decide Before You Book or DIY
For a single event or a few days of wear, a home kit with scattered placement and a careful top coat seal is enough, and costs under $20. For a longer stretch or a denser, more dramatic design, a salon application held up considerably longer in direct comparison and is worth the added cost. Either way, ask for flat-back crystals with sealed edges, and always soak crystals off rather than picking them.

