


Most 2026 nail trend roundups show you the finished look and leave you to work out how it’s actually done. This is a technique guide instead: what each of the ten techniques shaping 2026 nail art actually requires, how difficult it is to attempt yourself, and how each one tends to wear over two weeks.
1. Glazed Jelly
A translucent, sheer-coloured gel base built up in thin layers under a high-gloss top coat, so the natural nail shows through slightly and the finish reads like wet glass rather than flat colour. Nail artist Olha Shtanhei, who has worked on this look for major clients, describes the effect as “a juicy, translucent quality, almost like lip gloss on the nails.”
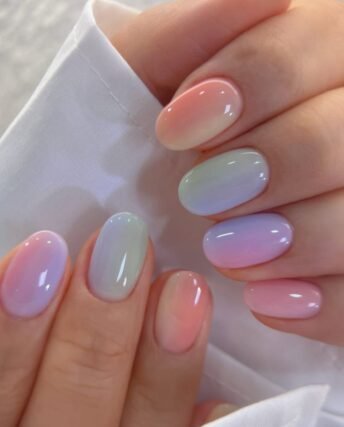
What it needs: gel polish in a sheer or jelly-finish shade, a UV or LED lamp, and patience for multiple thin coats: three to four layers is typical to build the depth.
Difficulty: gel-dependent. Achievable at home with a lamp, but the thin-layer technique takes practice to avoid streaking.
How it wears: gracefully. Because the finish is already translucent, the regrowth line is visible but soft rather than a hard contrast edge.
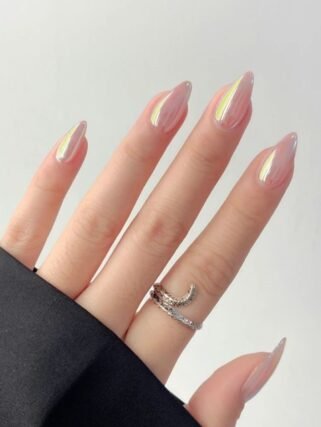
2. Soft Chrome (Pearl Chrome)
Chrome powder buffed over a base colour, but in 2026 the direction has shifted from hard mirror chrome toward a softer, pearl-finish version that shifts colour with the light rather than reflecting like a mirror.
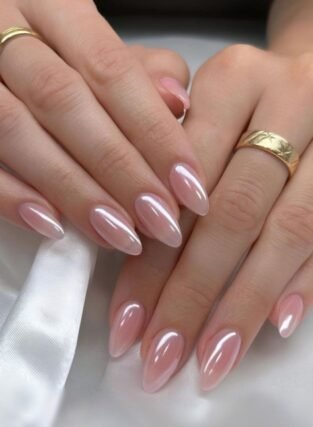
What it needs: chrome powder, a sponge or applicator, and a tacky-free gel base coat for the powder to adhere to.
Difficulty: gel-dependent, moderate. The powder application itself is quick; getting even coverage without patchiness takes a few attempts.
How it wears: better than hard mirror chrome. The softer, less reflective finish means regrowth is less visually jarring than on high-shine chrome, which shows the line almost immediately.
3. Reverse Stamping
A nail art transfer technique where a design is stamped onto a silicone pad first, then transferred onto the nail. This is the reverse of standard stamping, which allows more colour layering and cleaner detail than stamping directly onto the nail.
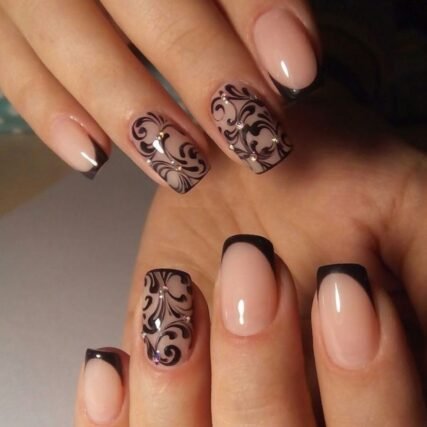
What it needs: a stamping plate, a silicone stamper, stamping polish, and a steady hand.
Difficulty: the hardest technique on this list to learn from scratch. The timing of transferring the design before it dries on the silicone pad is the main skill, and it typically takes several failed attempts before the transfer becomes reliable.
How it wears: well, once sealed under a top coat, since the design sits on top of the base colour rather than being painted freehand, so it doesn’t crack the way hand-painted detail can.
4. Water Marbling
Polish colours dropped onto the surface of room-temperature water, swirled into a pattern with a tool, then the nail is dipped through the pattern to pick it up.
What it needs: a cup of water, several polish shades, a toothpick or dotting tool, and tape to protect the surrounding skin.
Difficulty: high. Water temperature, polish consistency, and timing all affect whether the polish spreads correctly on the water’s surface, and the technique is genuinely difficult to get right on a first try.
How it wears: reasonably well once cleaned up and top-coated, though the marbled pattern can look less crisp than a stamped or hand-painted design.
5. 3D Embellishment
Adding physical elements — crystals, pearls, metal studs, or small charms, onto the nail surface rather than painting a flat design.
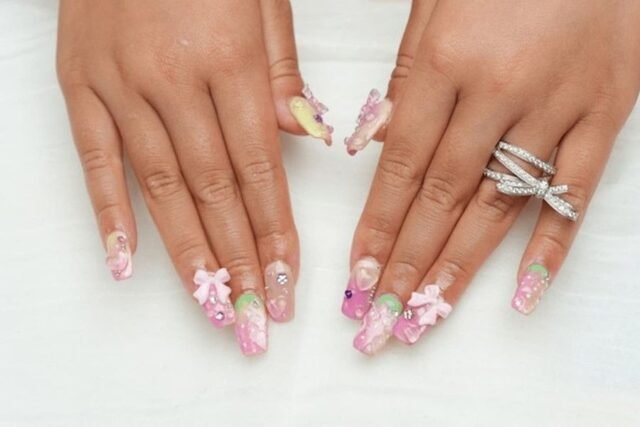
What it needs: nail glue or a gel base to set the embellishments into, tweezers, and the embellishments themselves.
Difficulty: low for placement, but embellishments are the technique most likely to be lost during normal wear if not properly sealed.
How it wears: the shortest-lived technique on this list unless a strong top coat is applied around the base of each piece. Crystals on fingertips especially are prone to catching and coming loose within the first week.
6. Negative Space
Deliberately leaving sections of the natural nail bare or using clear polish as part of the design, so the design reads as much from what’s absent as what’s painted.
What it needs: precise tape lines or a very steady brush, since the bare sections need clean, deliberate edges to read as intentional rather than unfinished.
Difficulty: moderate. The concept is simple, but clean edges are harder to achieve than they look, especially around the cuticle line.
How it wears: depends on how much bare nail is left exposed. More bare nail means faster visible growth, since there’s no polish to obscure the natural nail’s own growth pattern.
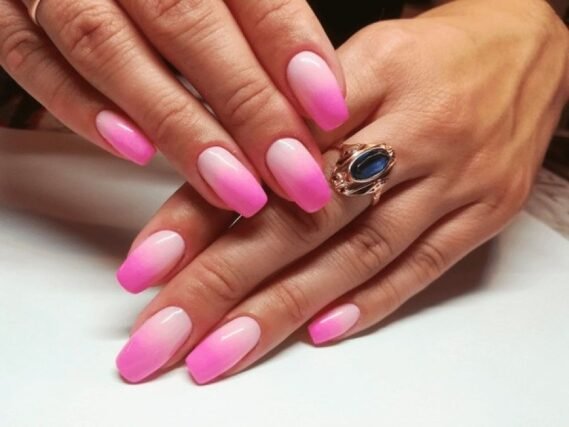
7. Ombré / Gradient
Two or more polish shades blended together on the nail so they fade into each other rather than sitting as distinct blocks of colour, usually applied with a makeup sponge rather than a brush.
What it needs: a makeup sponge, two or more polish shades, and a fast hand since the polish needs to be applied to the sponge and pressed onto the nail before it dries.
Difficulty: low to moderate. This is one of the more forgiving techniques for a first attempt, since imperfect blending still reads as an intentional gradient effect.
How it wears: well, since there’s no hard colour line to show a break in the design as the nail grows.
8. Fine-Line French
A modern take on the classic French manicure using an ultra-thin tip line, sometimes just one to two millimetres, often in a colour other than white.
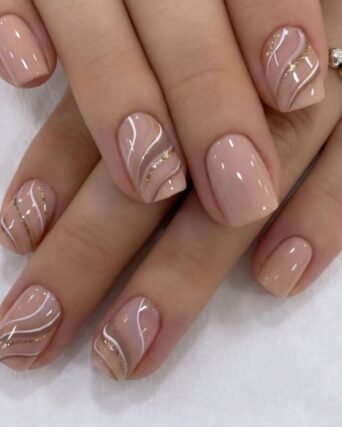
What it needs: a fine detail brush or a striping tape, and a steady hand. The thinner the line, the less room there is to correct a mistake.
Difficulty: moderate to high. Counterintuitively, a thin line is harder to paint cleanly than the traditional thicker French tip, because there’s less margin for a wobble.
How it wears: well, and it’s one of the more low-maintenance techniques on this list, since a thin tip line shows less obvious regrowth than a solid colour block.
9. Hand-Painted Watercolour
Soft, blended colour applied with a fine brush to mimic watercolour painting, often varying slightly between each nail rather than repeating an identical pattern.
What it needs: a fine detail brush, diluted or sheer polish, and a willingness to let each nail come out slightly different, since exact repetition isn’t really the point of this technique.
Difficulty: moderate. More forgiving than reverse stamping or marbling, because slight variation between nails looks intentional rather than like an error.
How it wears: moderately well if sealed properly, though hand-painted detail is more prone to chipping at the free edge than a technique built up under gel.
10. Cat-Eye (Magnetic Polish)
A magnetic polish containing metallic particles that a magnet tool pulls into a striped or eye-shaped pattern before the polish cures, creating a shifting, dimensional effect under different light.
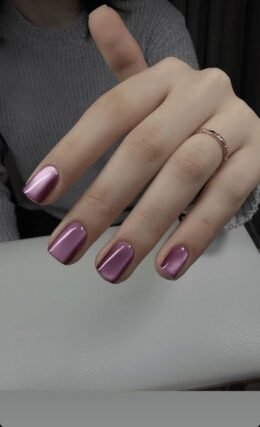
What it needs: magnetic polish and the magnet tool that’s usually sold with it, plus a UV/LED lamp for the gel version.
Difficulty: low. This is one of the easier techniques on this list to get a professional-looking result from on a first attempt, since the magnet does most of the work.
How it wears: well — the effect is sealed under gel top coat in most applications, so it holds up similarly to any standard gel manicure.
A Real Attempt: Soft Chrome, Second Time Around
In our own family, soft chrome was the technique that best matched what this guide describes. The first attempt wasn’t especially smooth. Getting the powder to sit evenly without patchy spots took real trial and error, which lines up with what’s noted above about the application being quick but even coverage taking practice. The second attempt came out considerably better, with a clean, professional-looking finish that’s since been repeated for other occasions. That second attempt, done properly, took roughly 30 to 40 minutes for a full set, which is a useful benchmark if you’re planning around a specific event rather than trying it with no time pressure.
That two-attempt pattern is worth knowing before trying this one yourself, since it’s easy to judge a technique by a first result that looks patchy. The second attempt is usually where it clicks.
Ombré was a more straightforward experience by comparison. It worked well on the first attempt, which matches its reputation here as one of the more forgiving techniques for a beginner. Between the two, it’s a reasonable technique to start with if the goal is a confidence-building first result rather than a technique that needs a second try to look right.
Technique Comparison at a Glance
| Technique | Difficulty | Needs a Lamp? | Typical Wear |
|---|---|---|---|
| Glazed jelly | Moderate | Yes | Graceful growth-out |
| Soft chrome | Moderate | Yes | Better than hard chrome |
| Reverse stamping | High | No | Good once sealed |
| Water marbling | High | No | Reasonable |
| 3D embellishment | Low (placement) | No | Shortest-lived |
| Negative space | Moderate | No | Depends on bare area |
| Ombré/gradient | Low–Moderate | No | Good |
| Fine-line French | Moderate–High | No | Low-maintenance |
| Hand-painted watercolour | Moderate | No | Moderate |
| Cat-eye/magnetic | Low | Yes (gel version) | Good |
Which Techniques to Start With
If you’re trying nail art at home for the first time, ombré, cat-eye, and 3D embellishment are the three most forgiving starting points, since none of them punish a slightly imperfect first attempt the way reverse stamping or water marbling will.
Reverse stamping and water marbling are worth attempting once you’re comfortable with the basics, but budget time for more than one try. Both are also the two techniques a salon visit is most likely to be worth the cost for, if the goal is a clean result on the first attempt rather than practice.
Frequently Asked Questions
What’s the easiest nail art technique for a beginner?
Ombré/gradient and cat-eye magnetic polish are generally the most forgiving. Both allow for some imprecision without the result looking like a mistake, unlike techniques such as fine-line French or reverse stamping.
Do I need a UV or LED lamp for these techniques?
Only for gel-based techniques: glazed jelly, soft chrome, and the gel version of cat-eye all need a lamp to cure. Polish-based techniques like water marbling, ombré, and hand-painted watercolour don’t.
Which nail art technique lasts the longest?
Fine-line French and ombré tend to show the least visible regrowth, since neither creates a hard colour line at the cuticle as the nail grows. 3D embellishment tends to last the shortest amount of time unless sealed carefully.
Why does chrome nail polish show regrowth so fast?
Hard mirror chrome creates a highly reflective, high-contrast finish, so even a small amount of regrowth reads as an obvious line. Softer, pearl-finish chrome is less reflective and hides the same amount of regrowth more effectively.
Is reverse stamping worth learning at home, or should I get it done professionally?
It depends on how much you value the process versus the result. The technique takes several failed attempts to master, so if a clean result on the first try matters more than the learning process, a salon visit is the more reliable route.
What to Try First
Start with whichever technique matches the tools you already own. If you have a UV lamp, cat-eye and soft chrome are the two most beginner-friendly gel techniques. If you’re working with polish alone, ombré is the most forgiving place to start before attempting anything that requires precision, like fine-line French or reverse stamping.

