

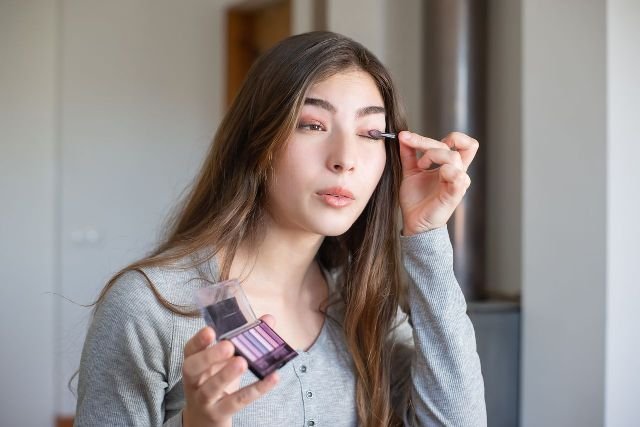
Learning how to apply eyeshadow is less about owning the right palette and more about three habits: priming properly, following a logical color order, and adjusting placement for your own eye shape. Most beginner looks fail on that third point. Color gets placed where the socket bone sits underneath rather than where the eye visually folds when it is open, and the whole look disappears the moment you stop looking down into a mirror.
This guide walks through a repeatable four-step method, the placement adjustments for six different eye shapes, and a troubleshooting table for the problems most tutorials skip: patchiness, creasing, muddy blending, and fallout.
The Tools That Matter
You do not need fifteen brushes. Four tools, used correctly, cover almost everything.
| Tool | Job | What to look for (entry level) | What premium adds | Why it matters |
|---|---|---|---|---|
| Flat shader brush | Packs pigment onto the lid | Short, densely packed synthetic bristles | Firmer construction that holds its shape through more washes | Dense bristles deposit color without diffusing it |
| Fluffy blending brush | Softens crease edges | Anything labelled “fluffy” or “blending”; synthetic is fine | More tapered, airier bristle head for finer control | Loosely packed bristles pick up less pigment and spread it instead |
| Small pencil brush | Precision in the corners | A small, tightly tapered tip | Natural or premium synthetic blend for cleaner edges | A narrow tip controls placement in the outer V and lower lash line |
| Eyeshadow primer | Prevents creasing | An affordable silicone or cream-based formula | Longer-wear, oil-controlling formulations | Absorbs oil and creates a tacky surface for pigment to grip |
For everyday application, most people will not see a meaningful difference between entry-level and premium tools. The gap shows up mainly in edge control for advanced techniques like foiling, covered later in this guide.
How to Prime Your Eyelids
Skipping primer is the most common reason a look that seemed sharp in the morning has vanished from the lid by early afternoon. The process takes under two minutes:
- Apply a rice-grain-sized amount of primer using your ring finger.
- Pat, rather than rub, across the entire lid, including the inner corner and up to the brow bone.
- Wait 60 seconds for the primer to set into a slightly tacky finish before adding shadow.
If your lids feel oily by midday, use a mattifying, silicone-based primer. If they feel tight or flaky, choose a cream-based, slightly hydrating formula instead. Applying shadow over primer that has not set yet is the single most common reason color drags instead of blending.
One safety note worth repeating: the eye area is thin, sensitive skin. The FDA’s guidance on eye cosmetic safety recommends replacing eye products regularly, never sharing them, and stopping use immediately if irritation develops.
Eyeshadow Shade Guide by Eye Color
This is the part most beginner guides skip, and it changes how a finished look photographs.
| Eye Color | Shades That Create Contrast | Shades to Use Sparingly |
|---|---|---|
| Blue | Warm copper, terracotta, bronze | Cool-toned blues, which blend into the eye instead of framing it |
| Green | Plum, warm brown, deep purple | Green shadows, which can flatten the natural color |
| Brown | Nearly all shades work; deep navy and forest green stand out most | None. Brown eyes have the widest compatibility range |
| Hazel | Gold, warm green, copper | Cool grays, which mute the color-shift effect hazel eyes are known for |
Skin tone changes how a shade reads too. Matte shadows tend to look softer on deeper skin tones, while shimmer formulas often need a slightly deeper shade underneath to show up clearly, otherwise the shimmer can look faint rather than intentional. On fairer skin tones the reverse is usually true: shimmer registers quickly, and matte shades need a slightly heavier hand. Our wider beauty and styling guides cover shade matching for foundation and blush in more detail.
How to Apply Eyeshadow: The Core Method
This four-step order works for most everyday and evening looks, powder or cream.
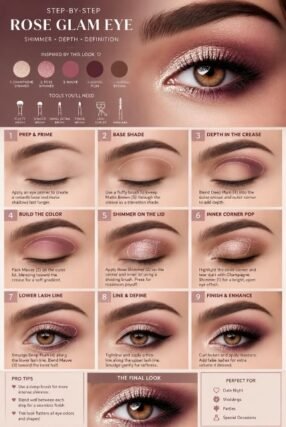
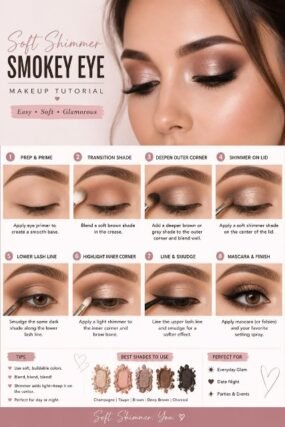
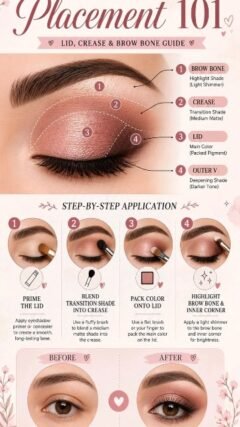
Step 1: Base shade. Sweep a neutral, skin-tone-matching shade across the full lid using two or three light passes. Think of this as the canvas the rest of the look builds on rather than the colour anyone will notice.
Step 2: Crease definition. Load your fluffy brush, tap off the excess powder, and use a back-and-forth motion along the crease. Build color in three to four thin layers instead of one heavy pass. This is what prevents the harsh, chalky line beginners tend to get.
Step 3: Outer corner depth. Apply your darkest shade in a soft V-shape at the outer corner, extending about one-third of the way across the lid. Check progress after each layer under natural light rather than a bathroom mirror, since artificial light disguises unevenness.
Step 4: Highlight and blend. Add a light, shimmery shade to the inner corner and brow bone. Switch to a clean fluffy brush and blend every transition point for 30 to 45 seconds until no hard edges remain.
Eye Shape Placement Guide
Placement that works for almond eyes can make hooded or monolid eyes look muddier rather than more defined. Here is the adjustment for each shape.
| Eye Shape | Visual Identifier | Placement Fix |
|---|---|---|
| Hooded | Little to no visible crease when the eyes are open | Place color 3 to 5mm above the physical crease and blend in upward diagonal strokes |
| Monolid | No visible crease fold at all | Skip crease shading and use a gradient from light at the lid to dark at the lash line |
| Deep-set | Crease sits far back, lid looks recessed | Keep dark shades close to the lash line and avoid heavy socket shading |
| Almond | Balanced, visible crease with tapered corners | The most flexible shape. Classic, cut crease, and smoky techniques all work well |
| Round | Crease visible, iris fully surrounded by white | Extend the outer corner shade beyond the natural corner to elongate the shape |
| Downturned | Outer corners angle slightly down | Angle the outer V upward toward the brow tail instead of following the natural downward line |
Hooded eyes cover much of the mobile lid when open, which is why anatomical crease placement vanishes the second you look straight ahead. Marking the visual crease with a pencil brush before blending prevents this almost entirely.
Troubleshooting: Common Mistakes and Fixes
| Symptom | Likely Cause | Fix |
|---|---|---|
| Shadow looks patchy | Applied over unset primer, or too little product | Wait the full 60 seconds after priming and build color in thin layers |
| Color disappeared by midday | No primer, or primer applied too thick | Use a thin, tacky-set layer and avoid rubbing it into the lid |
| Harsh line in the crease | Blending brush overloaded, or not enough blending time | Tap off the excess before blending and spend at least 30 seconds softening the edge |
| Muddy, brownish-gray result | Too many shades layered without cleaning the brush | Wipe the brush between shades using a tissue or brush cleaner spray |
| Fallout under the eyes | Loose powder pigment applied without tapping off the excess | Do under-eye concealer last, or hold a spoon beneath the lash line to catch fallout |
| Crease color invisible when the eyes are open | Color placed in the anatomical crease rather than the visual one | Reposition using the 3 to 5mm rule above |
Pro-Level Techniques: Cut Crease and Foiling
Once the core method feels automatic, these two techniques produce noticeably more dramatic results. Both take several practice sessions before they look clean, particularly on hooded or downturned eyes, and that learning curve is normal.
Cut crease creates a sharp, graphic line instead of a soft gradient. Apply a light matte shade across the lid first, then use a small precision brush with a slightly damp tip to carve a defined line along your natural or visual crease. The contrast reads most clearly on almond and hooded eyes.
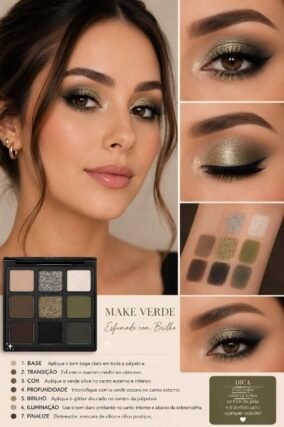
Foiling intensifies shimmer shadows into a near-liquid metallic finish. Dip a flat, dense brush into setting spray or a dedicated mixing medium, then pat the shadow onto the lid rather than swiping it. Swiping breaks down the pigment payoff while patting preserves it. This is where densely packed premium brushes outperform cheaper ones, since softer bristles absorb more product and waste pigment.
Two Looks, One Method
For everyday wear, the four-step process takes about five minutes: a warm neutral base, a soft brown crease built in three thin layers, a deepened outer V, and a gold inner-corner highlight.
For evening, keep the same structure but add a cut-crease line and foil the centre of the lid with a copper shimmer. Same underlying method, different intensity.
Conclusion
Knowing how to apply eyeshadow comes down to priming correctly, following a logical color order, and adjusting placement for your specific eye shape. The troubleshooting table above solves most beginner problems in seconds, and cut crease and foiling give you somewhere to grow once the basics feel automatic. Start with the four-step method, note which fixes apply to your own eyes, and build from there.
Frequently Asked Questions
How long should I wait after applying primer before adding eyeshadow?
Wait around 60 seconds. Primer needs a moment to set into a slightly tacky texture, which is what allows pigment to grip instead of sliding around.
What causes eyeshadow to look muddy instead of blended?
Layering multiple shades without cleaning the brush between them is the most common cause. Wipe your brush with a tissue before switching colors to keep the tones distinct.
Do I need different brushes for cut crease versus everyday application?
Partially, yes. A small precision brush with a slightly damp tip creates the sharper line a cut crease requires, while a standard fluffy brush is too diffuse for that effect.
How do I know if I have hooded eyes or deep-set eyes?
Hooded eyes show little to no visible crease when open, while deep-set eyes show a crease but the lid itself appears recessed into the socket. A side profile in natural light usually clarifies which applies.
Can the foiling technique be done with any eyeshadow?
Only shimmer or metallic formulas foil well. Matte shadows lack the reflective particles needed for the wet, intensified finish this technique produces.
Why does my outer corner shade look uneven?
This usually happens when progress is only checked under bathroom lighting. Natural light shows unevenness that artificial light hides, so blend near a window when you can.
Is it necessary to match eyeshadow shades to eye color?
It is optional rather than required, but shades roughly opposite your eye color on the color wheel, such as copper for blue eyes, tend to create more visible contrast in photos.
How long does it take to get good at eyeshadow application?
Most people see consistent results within a few weeks of regular practice. Advanced techniques such as cut crease take longer, since the line work needs a steadier hand than everyday blending does.

