

By Mania, Senior Style Editor at WFashionLady
If you have small or almond-shaped eyes, you already know the biggest mistake most tutorials get wrong: they tell you to add more product. In reality, heavy or overly dark colours are usually what makes small eyes look even smaller, and can leave them looking sunken or tired by the end of the day. The better approach is simple: lift and brighten, instead of piling on more product.
We tested these techniques directly, including on almond-shaped and hooded eyes, and narrowed them down to what genuinely makes a visible difference.
Swap Your Black Waterline Liner for Nude
This is the one swap that made the biggest difference for Mania. Lining your waterline with black liner instantly closes up the eye space and makes it look smaller and more tired. Switching to a nude or flesh-toned pencil does the opposite — it creates the illusion of extra white space along the eye, which optically opens it up.
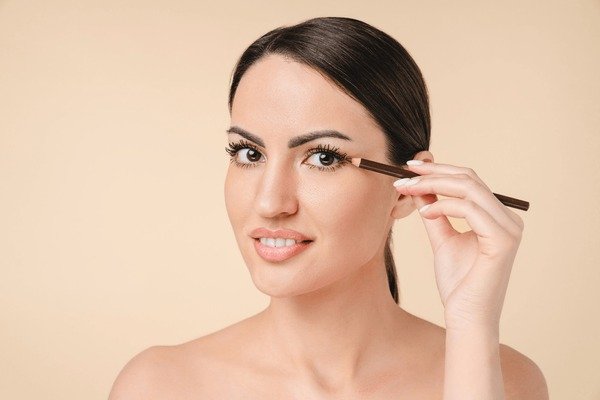
How to do it: Line your lower waterline with a nude or soft beige pencil liner instead of black or dark brown. This one swap alone can make small eyes look noticeably more awake.
Use a Soft Winged Liner With Tightlining
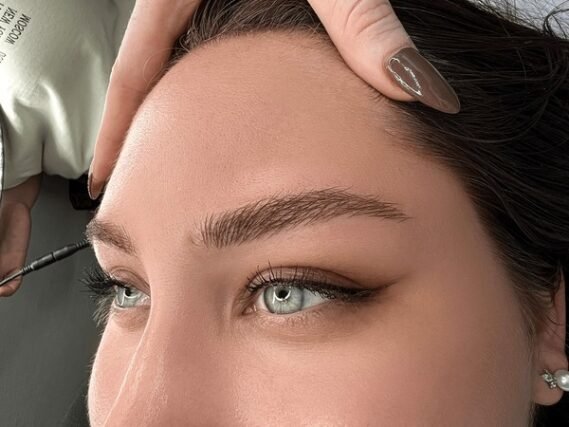
Black liner can look harsh on smaller eyes, especially in a bold wing. Instead, tightline your upper lash line (applying liner between the lashes, right at the roots) using a dark brown gel or liquid liner rather than black. Keep the wing soft, fine, and lifted slightly upward rather than thick or dramatic.
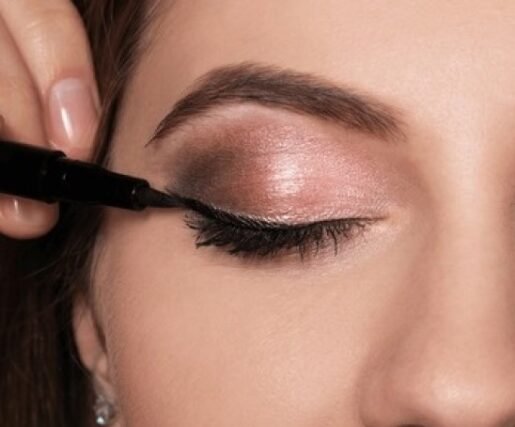
Why it works: A soft brown tightline defines the lash line without visually shrinking the lid space, and a subtle upward flick lifts the outer corner rather than weighing it down.
Beginner tip: The trickiest part of this step is getting a symmetrical wing, especially on hooded or smaller eyes where the natural fold can throw off the angle. Instead of going straight in with liquid liner, first sketch a guide line with a small angled brush and a soft brown or black eyeshadow, following the angle of your lower lash line extended slightly upward. Once you’re happy with the shape, trace over it with your gel or liquid liner. If the line comes out slightly uneven, a cotton bud dipped in micellar water or a touch of concealer will sharpen the edge without you having to start over.
Try the Center-Brightening Halo Eyeshadow Technique
This technique creates natural depth and brightness at the same time. Apply a soft, warm brown or taupe shade lightly through the crease for gentle definition, then tap a champagne or soft gold shimmer directly onto the centre of the eyelid.
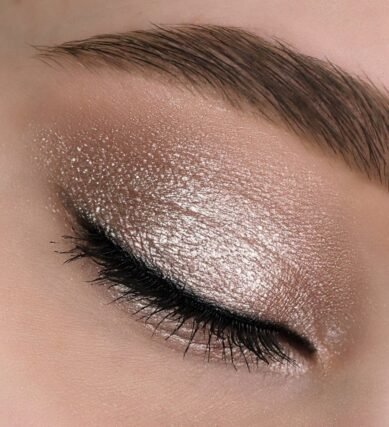
Why it works: When light hits that shimmer at the centre of the lid, it draws the eye forward and makes it appear to pop, which reads as bigger and brighter overall.
Colours to avoid: Steer clear of dark matte shades — heavy black, deep charcoal, or dark matte brown — swept across the entire lid. Matte dark colours absorb light rather than reflect it, which can make small eyes look more sunken instead of brighter. It’s also worth avoiding chunky, heavy glitter or multi-coloured glitter, since thick glitter tends to blur the natural shape of the lid and dull the eye’s expression. Soft satin, champagne, or fine gold shimmer works best because it reflects light rather than absorbing it.
Master the Mascara Wiggle-and-Lift Technique
Curl your lashes first, then apply mascara using a wiggling motion at the roots, brushing upward and outward as you go. Pay particular attention to the outer corner lashes — add a touch more product there and brush them diagonally outward.
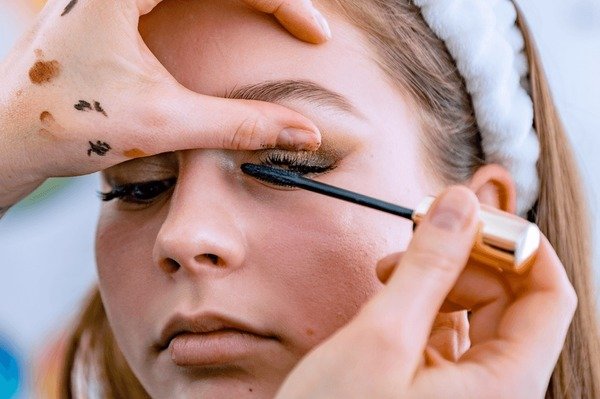
Why it works: This creates a subtle cat-eye lift at the outer corners, which elongates the eye shape and makes it appear more open, rather than rounder and smaller.
Minimise Product on the Lower Lash Line
It’s tempting to think that filling in the entire lower lash line with dark kohl will make eyes look bigger and bolder. In practice, it does the opposite. A fully dark lower lash line and waterline can make small eyes look pin-point tiny.
What to do instead: Either skip lower lash line product altogether, or softly smudge a little brown eyeshadow along just the outer third for gentle definition without closing the eye down.
Skip the Thick, Dramatic Wing
A bold, thick winged liner might look striking on larger eyes, but on smaller eyes it tends to cover too much of the lid space. The result is a heavier, more closed-off appearance rather than an open one.
What to do instead: Keep any wing fine, crisp, and only slightly upturned. A thin lift at the outer corner elongates the eye without overwhelming it.
What Doesn’t Work vs. What Works, at a Glance
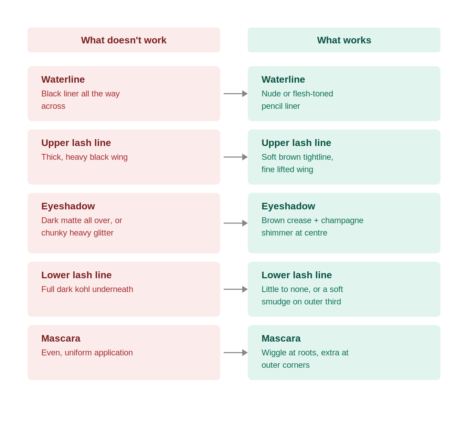
| Area | What Doesn’t Work | What Works |
|---|---|---|
| Waterline | Black liner all the way across | Nude or flesh-toned pencil liner |
| Upper lash line | Thick, heavy black wing | Soft brown gel/liquid tightline with a fine, slightly lifted wing |
| Eyeshadow | Dark matte colour across the whole lid, or chunky heavy glitter | Soft brown/taupe crease shade with a champagne or gold shimmer at the centre |
| Lower lash line | Full dark kohl along the entire lash line | Little to no product, or a soft brown smudge on just the outer third |
| Mascara | Even, uniform application front to back | Wiggle at the roots, extra product and diagonal brushing at the outer corners |
Taking This Look From Everyday to Special Occasion
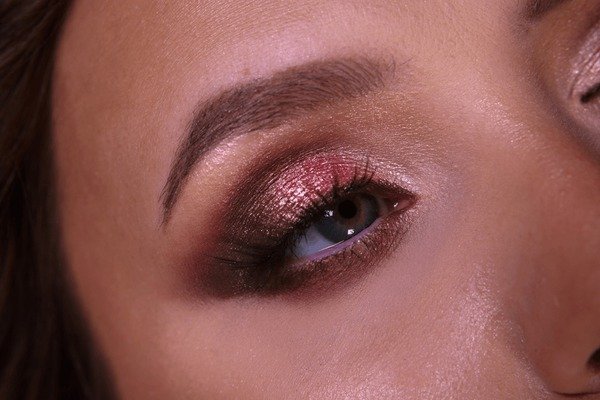
One of the best things about this technique is how easily it scales up. For an everyday version, the six steps above are enough on their own. For a party, event, or a long day-to-night occasion, only two small changes are needed.
First, swap the centre shimmer for a fine loose metallic pigment or glitter, which catches the light more under evening or event lighting. Second, make the soft brown wing slightly sharper and more elongated, and smoke out a touch of dark brown eyeshadow along the outer corner of the lower lash line. Nothing else needs to change — the base stays exactly the same, which keeps the eye looking open rather than heavy or closed off.
Mania tried this exact occasion version at a cousin’s wedding, where she needed a look that would last from morning functions through to the evening. Rather than reaching for a full smokey eye, she stuck with the soft elongated wing and centre-shimmer approach. An old friend came up to her partway through the day and asked why her eyes looked so much bigger and brighter than usual — a small moment, but a good sign the technique was doing exactly what it was meant to do.
How Long Does This Look Take?
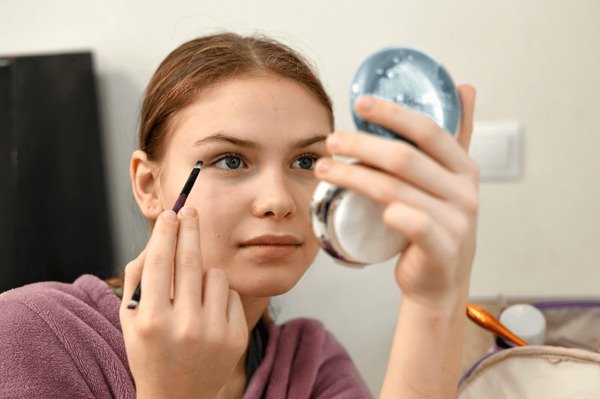
With a bit of practice, this full look — priming, transition shade, centre shimmer, liner, and mascara — takes roughly 7 to 10 minutes, making it realistic for everyday wear. The occasion version, with the sharper wing and smoked-out lower corner, takes a few extra minutes but uses the same core steps.
Products We’ve Used
- Maybelline Hyper Curl Mascara — budget-friendly and effective for the wiggle-and-lift technique
- Essence Long-Lasting Eye Pencil (nude shade) — affordable and long-wearing for waterline use
A Note on Waterline Safety
The waterline and inner eye area are more sensitive than the rest of the eyelid, so it’s worth being a little more careful here. Use a pencil specifically formulated for waterline or inner-eye use, avoid sharing eye pencils with others, and replace them every three months or if they start to feel dry or scratchy, since bacteria can build up on the tip over time. If you wear contact lenses or have sensitive eyes, patch-test any new product before applying it to the waterline.
Once your eye look is set, you may want to explore more seasonal beauty ideas to round out the rest of your look.
FAQ
Q: Will nude waterline liner work for all eye colours?
A: Yes — nude and soft beige tones work across eye colours because the effect comes from the optical illusion of extra white space, not from colour-matching your iris.
Q: Is black eyeliner completely off-limits for small eyes?
A: Not entirely — it can still work on the upper lash line in a fine, soft application. The main thing to avoid is heavy black on the waterline or in a thick dramatic wing.
Q: How often should I replace my waterline pencil?
A: As a general guide, replace eye pencils every three months, or sooner if the tip feels dry, hard, or scratchy.
Q: What’s the easiest way to fix an uneven winged liner?
A: Sketch the shape first with an angled brush and eyeshadow before going in with liquid or gel liner, and clean up any unevenness afterwards with a cotton bud dipped in micellar water.
Q: Can this look be adapted for evening events without redoing the whole face?
A: Yes — swapping the centre shimmer for a fine metallic pigment and sharpening the wing slightly is usually enough to take the same base look from day to evening.

