By Mania, Senior Style Editor at WFashionLady.
Most eyeshadow advice walks through a routine from start to finish and assumes the problem will just sort itself out along the way. This works differently. Each section below starts with a specific eyeshadow problem, the kind that usually sends someone searching for an answer mid-makeup, and breaks down exactly why it happens and what actually fixes it. For the full sequential routine this is built from, our step by step eyeshadow guide walks through the same process in order.
Key Takeaways
- Patchy eyeshadow almost always traces back to skipping a base or primer step, not a bad formula.
- Glitter fallout happens because the brush is dry, dampening it first fixes most of the mess.
- Harsh lines and “panda eyes” both come from the same root cause, going too dark, too early, without blending it out.
- Blending is the single hardest skill for beginners, and one neutral shade well blended beats several colors applied carelessly.
- Small finishing touches, like inner corner highlight, make a bigger visual difference than most beginners expect.
Mistake #1: Skipping the Base, Which Causes Patchy Eyeshadow
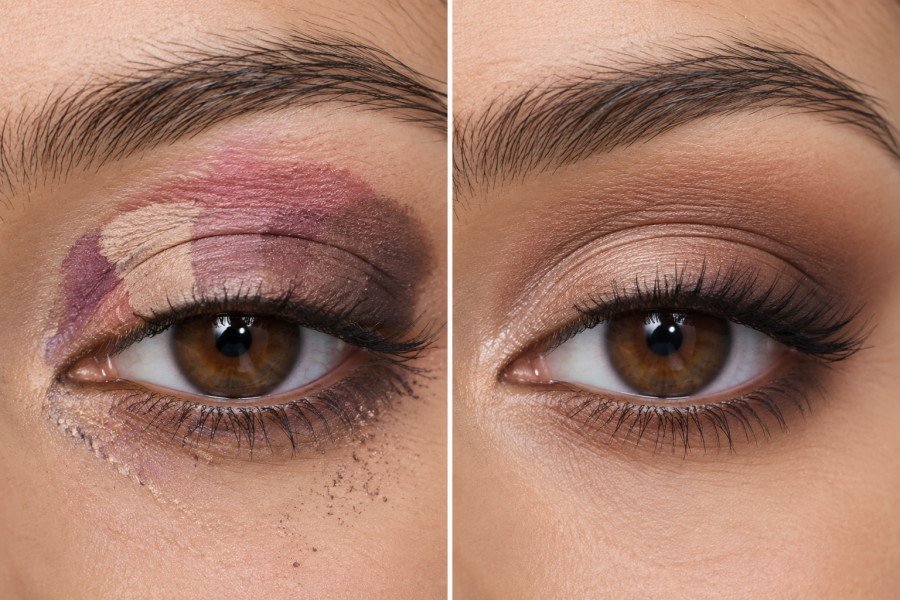
This almost always comes down to what’s underneath the color, not the eyeshadow itself. Applying eyeshadow directly onto bare, dry eyelids is what causes patchiness, since there’s nothing for the pigment to grip onto evenly. The fix is a proper base: a flat concealer brush or beauty sponge to prep the lid first, so colors go on smooth and actually stay put through the day. If a dedicated eye primer isn’t on hand, a light layer of concealer set with translucent powder works as a genuinely effective substitute.
Mistake #2: Going Dark Too Early, Which Muddies the Crease
This happens when a dark shade gets reached for too early and rubbed straight into the crease, which creates a heavy, “panda eye” effect instead of the soft depth a crease is supposed to have. The fix is starting with a lighter transition shade instead, something in the light brown or taupe range, applied with a fluffy blending brush using a gentle side-to-side sweep and very light pressure. That soft base is what makes the eye look shaped rather than smudged.
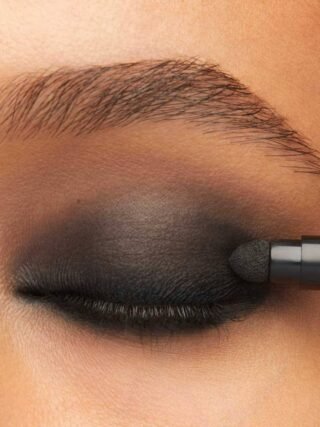
This one comes from personal experience. Getting ready for a family wedding back in college, a dark metallic brown shade went straight into the crease and outer corner with no transition shade first, on the theory that more dark shadow meant a more dramatic look. It looked fine in the mirror indoors, but under the event’s flash photography it read as harsh black patches with zero blending, panda eyes, essentially. A cousin quietly pulled Mania aside and pointed out it looked like soot had been rubbed over her eyes. That moment made the “less is more” and blending lesson stick. It took a few months of practice afterward to build the habit of starting light and blending properly before it became second nature.
Mistake #3: Using a Dry Brush on Shimmer, Which Causes Fallout
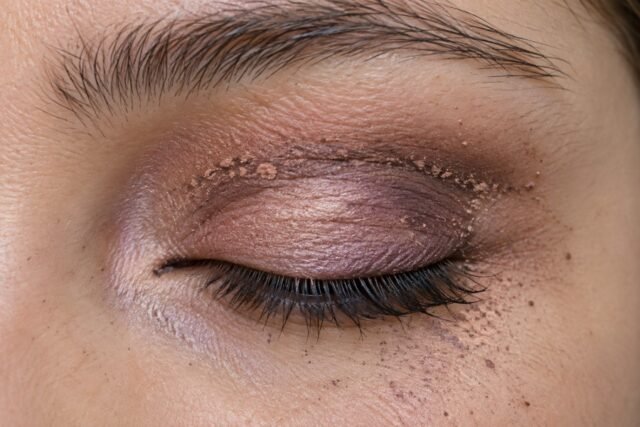
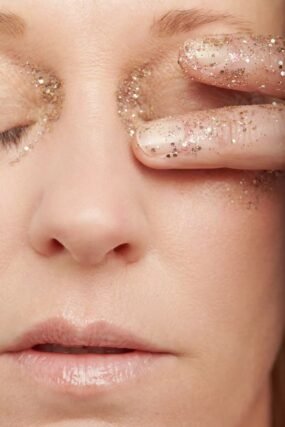
Glitter and metallic shades scatter under the eyes and across the cheeks when they’re pressed on with a completely dry brush. The fix is simple: lightly dampen the brush with setting spray before picking up the shimmer shade. This makes the color noticeably more vibrant on the lid and dramatically cuts down on fallout, a small step that changes the whole result.
Mistake #4: Dragging Dark Shade Too Far, Which Shrinks the Eye
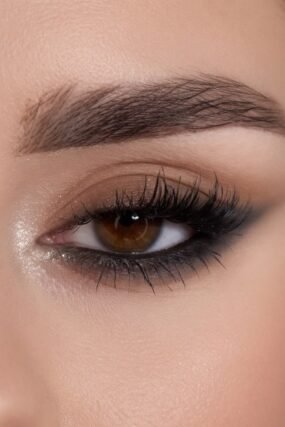
This is usually a placement problem. Dragging a dark shade too far toward the inner corner is what makes eyes look smaller instead of lifted. The fix is keeping that dark brown or soft black shade contained to a soft “V” shape right at the outer corner, blended without pulling it inward. Done correctly, this is what gives eyes a lifted, almond or cat-eye shape instead of just looking darker overall. Eye shape plays a role here too, our making small eyes look bigger guide covers exactly where to focus this kind of placement for different eye shapes.
Mistake #5: Overcomplicating the Blend Instead of Simplifying It
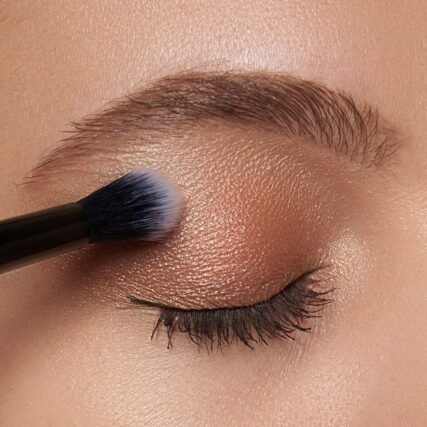
Blending is consistently the hardest part for beginners, mostly because it’s hard to judge where to stop or how far a color should travel. The simplest fix is to stop trying to manage multiple shades at once. Picking a single neutral warm brown, applying it across the whole lid, and softening the edges with a clean fluffy brush or even a fingertip builds a genuinely put-together look with far less effort than a multi-shade blend. For the tools that make this easier, our best eyeshadow brushes guide covers exactly which brush works for which job.
Common Mistakes at a Glance
| The Problem | The Real Cause | The Fix |
|---|---|---|
| Too many dark colors applied at once | Reaching for intensity right away instead of building it up gradually. | Start with a small amount of product and layer up slowly rather than going dark from the first pass. |
| Harsh, visible edges | Stopping blending too early, right where the color ends. | Use a clean fluffy brush with no product on it to blur the outer edges in a circular motion. |
| Inner corner and brow bone left flat | Treating them as optional rather than part of the look. | A touch of champagne highlighter on both instantly brightens and freshens the eye. |
| Overloaded lower lash line | Trying to match the intensity of the upper lid. | Skip the lower lash line entirely, or keep soft brown shadow to just the outer third. |
Eye Makeup Hygiene Nobody Talks About
Fixing application mistakes only goes so far if hygiene isn’t part of the routine too, especially this close to the eyes. A hard-panned, shiny surface on a powder eyeshadow, or a pigment that’s clearly faded, is the sign it’s time to let a product go. For cream or liquid formulas, an off chemical smell or a texture that’s turned dry and crumbly is a clear signal to toss it without a second thought.

Brushes get a weekly wash with a gentle baby shampoo or mild face wash, then dry flat. Sponge applicators that come packaged with palettes get thrown out right away, since they’re hard to clean properly. When fingers are used for a quick shimmer application, washing or sanitizing hands first keeps oil and dust off the eyelid.
If irritation or redness ever shows up from a new product or glitter, the first move is removing makeup immediately with micellar water or a gentle cleanser and rinsing the eyes with cool, clean water, then not touching that product again. Sharing eye makeup or applicators is avoided entirely, since the eye area is sensitive enough that sharing carries a real risk of spreading conjunctivitis or other bacterial infections from one person to another.
Frequently Asked Questions
Why does my eyeshadow look patchy no matter what I do?
Patchiness is almost always caused by applying eyeshadow directly onto bare, dry eyelids with no base underneath. A primer or a concealer-and-powder base fixes this in most cases.
How do I stop glitter eyeshadow from falling everywhere?
Dampen the brush lightly with setting spray before picking up the shimmer or glitter shade. This makes the color pick up more evenly and significantly reduces fallout compared to using a dry brush.
Why does my crease look dark and muddy instead of soft?
This usually happens when a dark shade is applied to the crease too early. Starting with a lighter transition shade in the light brown or taupe range and blending it in first creates a softer, more natural result.
What’s the easiest eyeshadow technique for beginners?
A single neutral warm brown shade applied across the whole lid and blended out at the edges with a clean fluffy brush is the simplest technique that still looks polished, no multi-shade blending required.
Is liquid eyeliner or a smudged eyeshadow liner better for beginners?
A smudged eyeshadow liner is generally more forgiving for beginners than liquid liner, since it creates a soft, smoky finish that hides small imperfections rather than demanding a precise, sharp line.
Is it safe to share eyeshadow or brushes with someone else?
Sharing eye makeup or applicators carries a real risk of spreading conjunctivitis or other bacterial infections between people, since the eye area is especially sensitive. Keeping eye products and brushes strictly personal is the safer practice.
Final Thought
Most eyeshadow problems trace back to one of these five root causes: no base, too dark too soon, a dry brush, misplaced dark shade, or overcomplicating the blend. One more habit worth swapping in for beginners specifically: smudging a dark eyeshadow along the lash line instead of reaching for liquid liner gives a softer, more forgiving finish while precision is still being built. Fix those five things and a polished result comes together without needing a long, complicated routine.